|
(and removing a rusted-on rotor) on a 2000 Jeep Grand Cherokee "WJ" (Laredo RWD 4.0 I-6) Click on any of the pictures for larger version of the image! 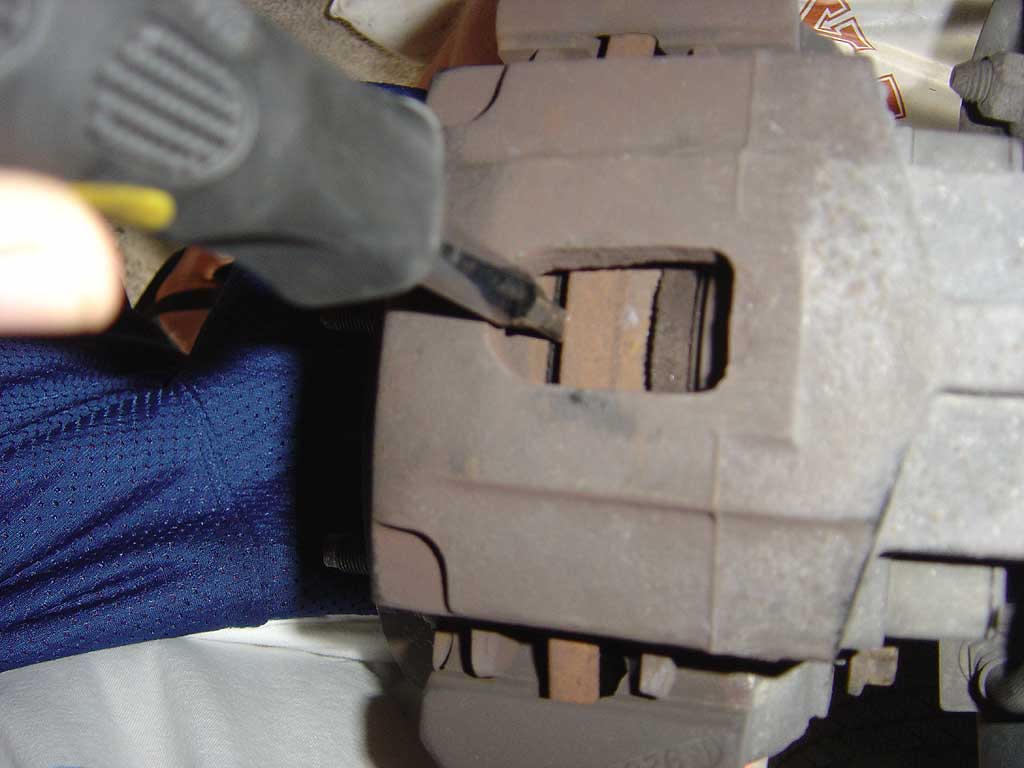 Pry caliper forward After jacking the vehicle up and removing the wheel, pry the brake caliper forward with a flat tip screw driver (in this picture, you're prying against the rotor, away from the rotor - this compresses the caliper piston so the pads are no longer grabbing the rotor). 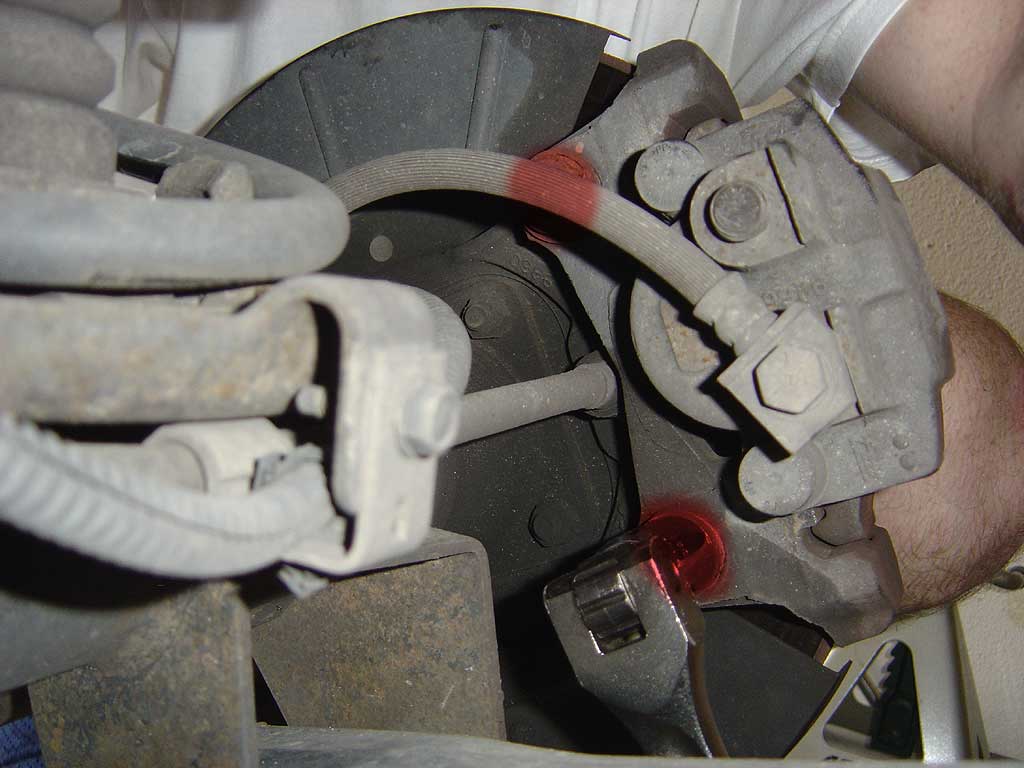 Remove 18mm caliper mounting bolts Remove the two 18mm caliper mounting bolts (I used a 1/2" drive breaker bar and 18mm socket to loosen them up first, and then pulled out a regular 3/8" drive socket wrench). Be careful not to stretch the rubber brake line near the top bolt. 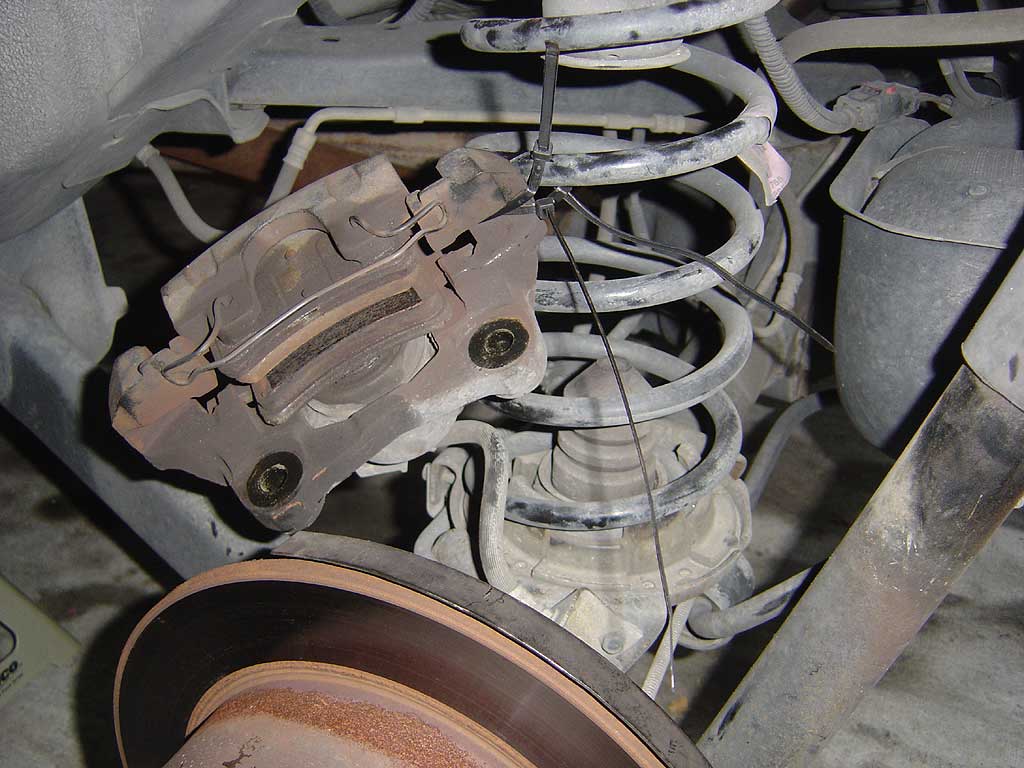 Secure caliper assembly to suspension with zip ties Secure the caliper assembly to the suspension with a few zip ties, to avoid putting stress on the brake hose (make sure there's some slack). 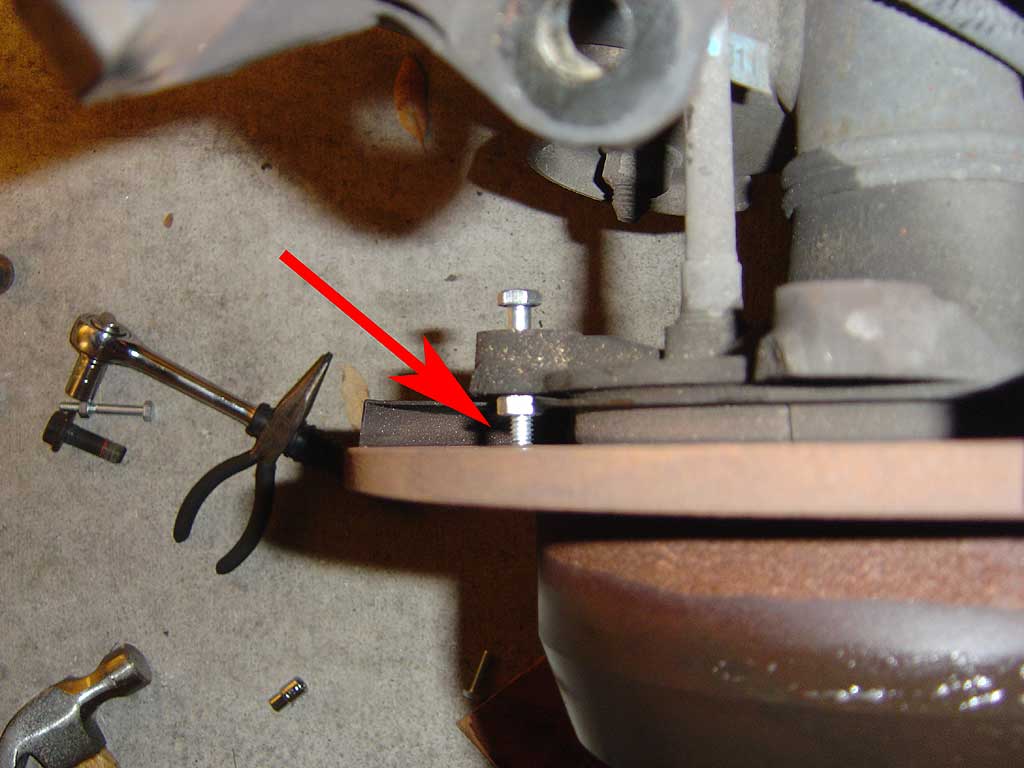 Removing a stuck / rusted rotor If you've released the emergency brake (or use the lockout spring on the e-brake handle), the rotor should fall off with minimal effort, unless your emergency brake shoes are too far extended (use the star adjuster to retract them) or the rotor is RUSTED to the wheel hub. Spray some WD-40 around the five wheel hub bolts to "soak in" behind the rotor. You'll need to insert a small bolt through one of the caliper mounting bracket holes (and a nut between the mounting bracket and the rotor surface). Due to the dust shield surrounding the REAR rotors, you can only fit a 1/4" hex bolt through the caliper mounting bracket holes (so be careful not to shear the bolt in half by tightening it too rapidly). Tighten the bolt down until you hear the rusted area crack loose, then turn the rotor a few inches and re-tighten until you evenly break the rust across the entire wheel hub surface. Try to keep the bolt from gouging the rotor surface (unless you're planning to replace the rotors, too). This trick is easier on the front rotors, where you can use a more substantial hex bolt because there's no dust shield obstructing the caliper mounting bracket. 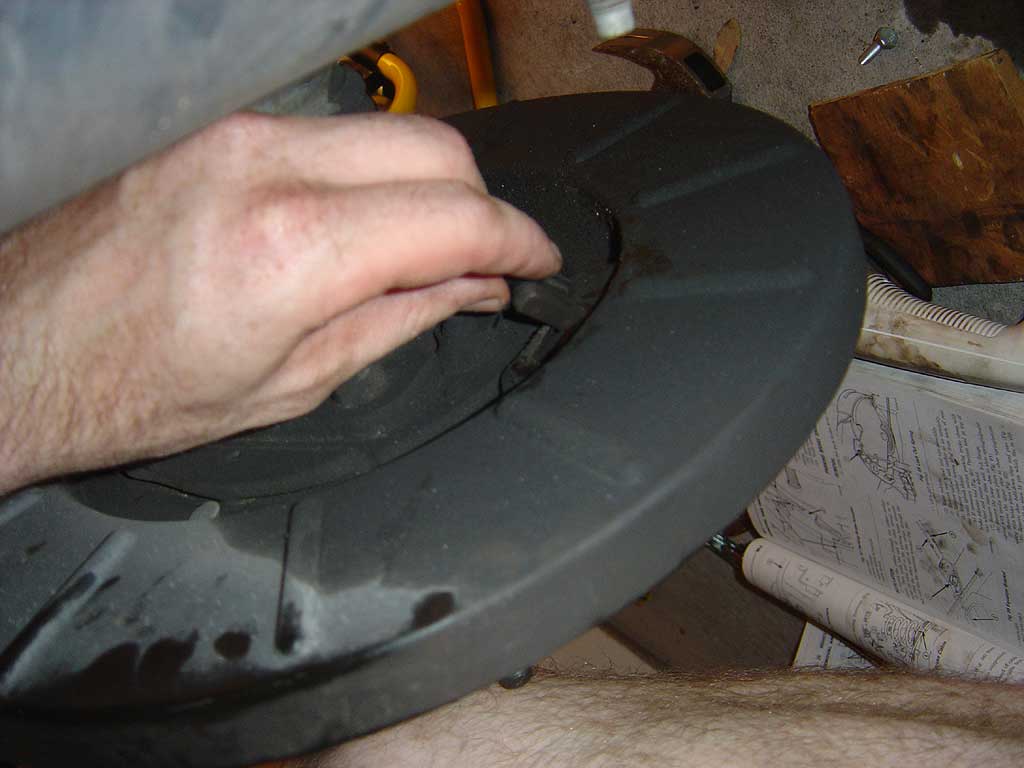 Loosen brake shoes with the star adjuster Remove the star adjuster rubber dust cover if you haven't already (this picture is actually sideways - the dust cover is near the BOTTOM of the dust shield). Use a screwdriver or angled brake adjuster tool to turn the adjuster "up" (ie: push towards the top of the adjuster) to retract the shoes (picture of the star adjuster is also displayed a few sections down). 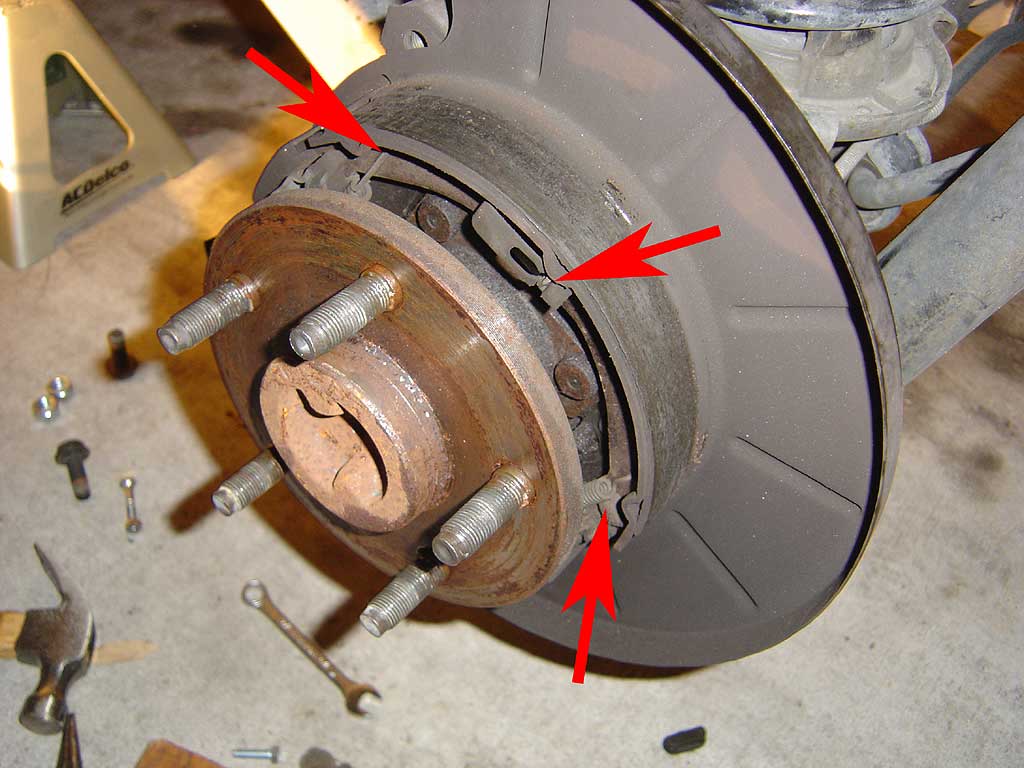 Remove old shoe mounting hardware and shoes Remove the center spring clip by pushing in and turning the anchor so it slides out. Remove the bottom spring with a pair of pliers. Pull both shoes up and wriggle the top spring out (easier than using tools to remove the extremely difficult top spring). 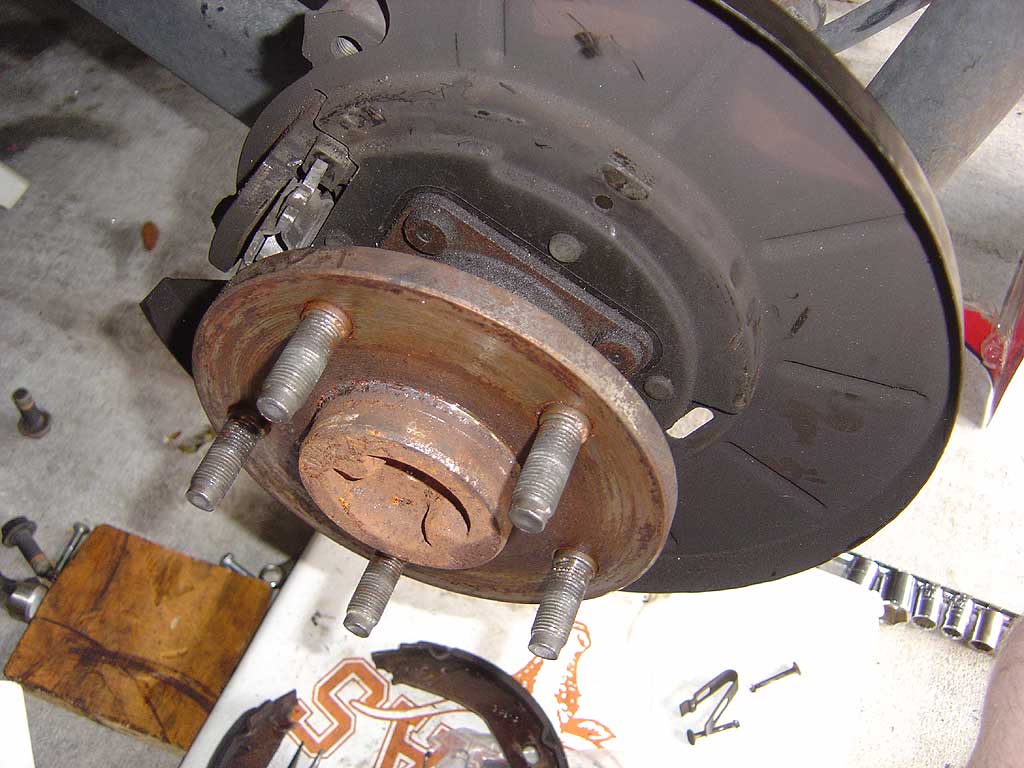 Shoes removed. 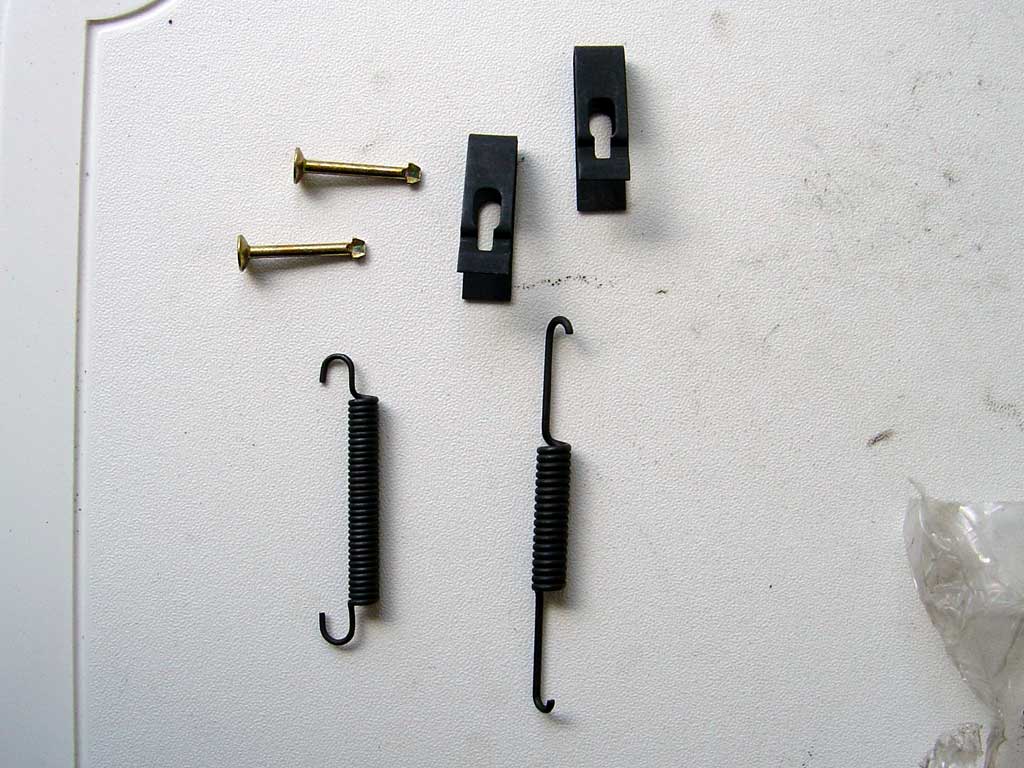 New mounting hardware - two anchor pins and spring clips, and the bottom and top springs. 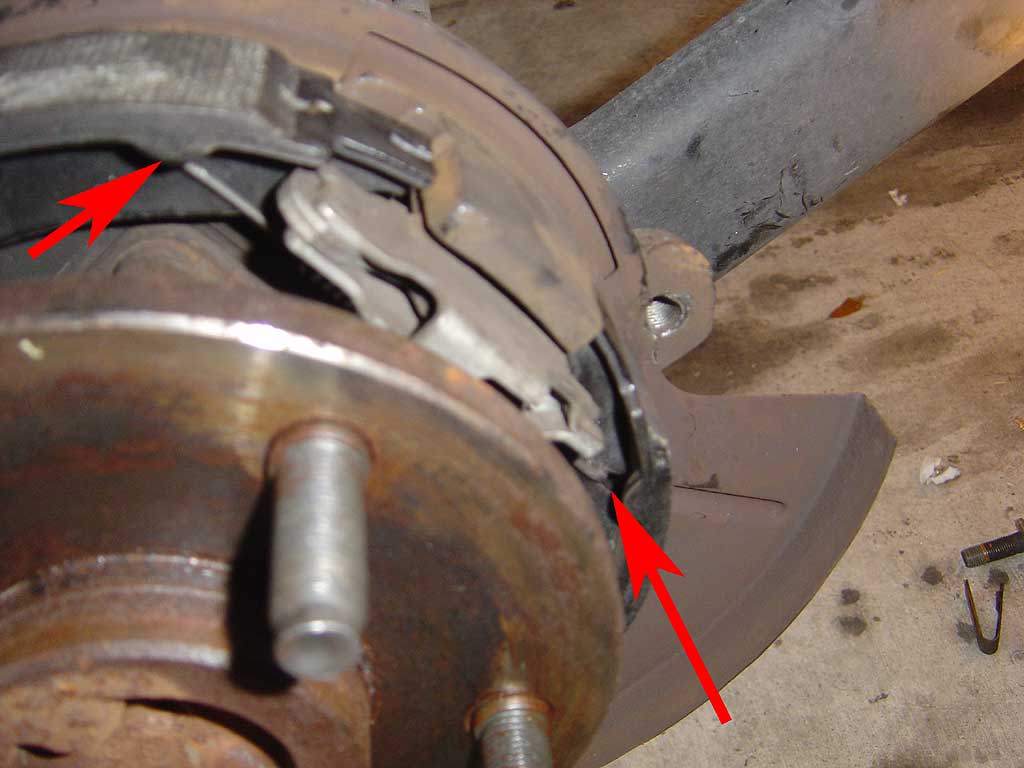 Add new shoes and connect new mounting hardware (hard part) Clean the star adjuster assembly up with WD-40 and add some grease. Put the new shoes on (tapered end of the shoe anchor at the "top" in the actual cable mechanism). Put the star adjuster assembly back in between the bottom of the two shoes and use a pair of pliers to connect the bottom spring to each shoe. The top spring really requires some muscle (and standard brake spring pliers do not work). Needle-nose vise grips and some "ooomph". This troublesome top spring is what I'm pointing to in the picture with the red arrows. Working with the right rear wheel in this picture, too. 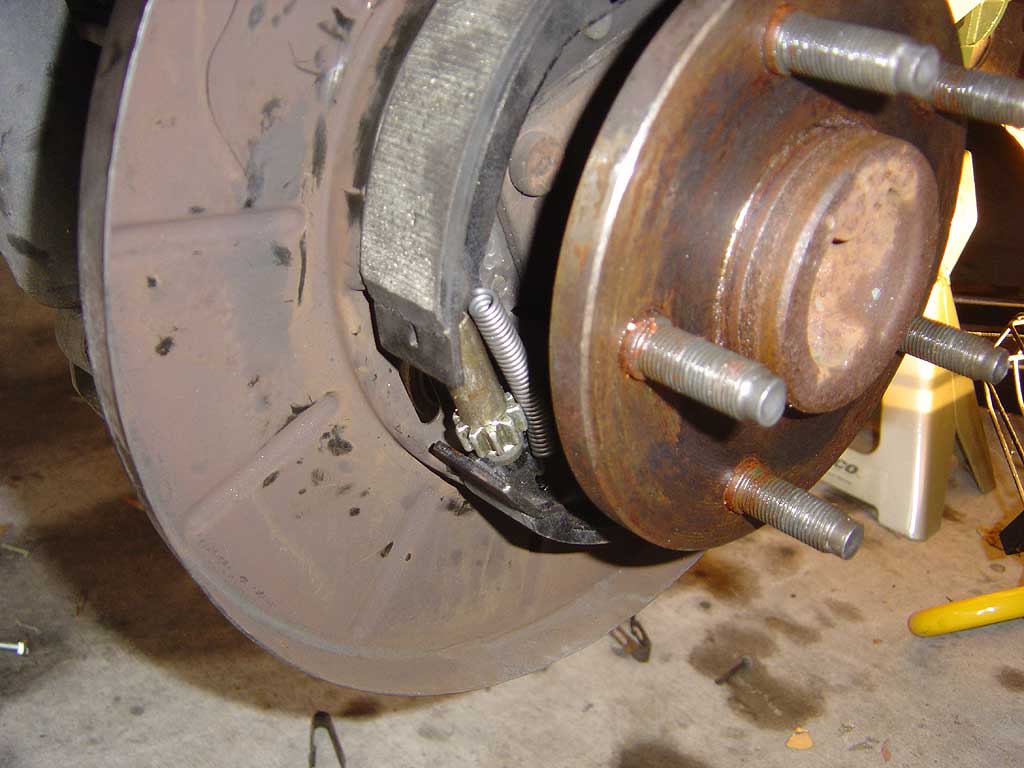 Star adjuster, cleaned up and installed (I've switched to the right rear wheel in this picture). 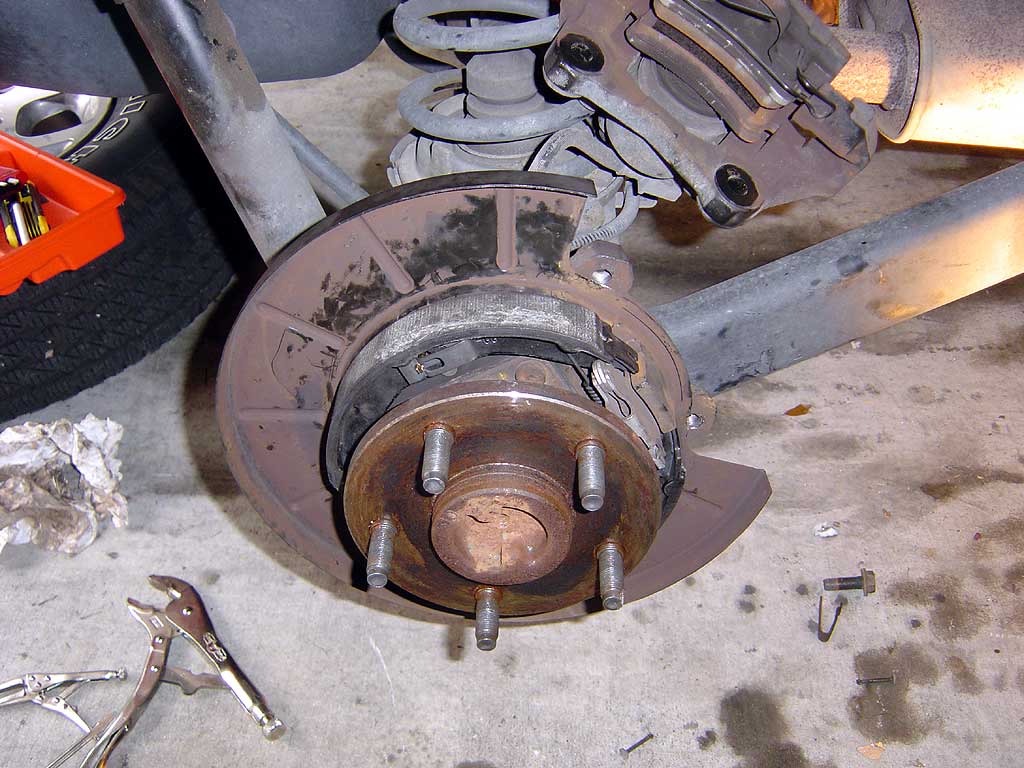 Finished assembly on the right side. At this point, you can throw the rotor back on, re-install the caliper and adjust the star adjuster until the shoes engage (and then back it off a few clicks so the wheel moves freely again). Refer to the factory service manual for the full procedure and appropriate torque values (this web page is intended as something to accompany actual REAL instructions on how to do this properly!). And as usual, if you're working on your WJ and have questions about doing any of this stuff, send an e-mail. There's also a great reference for all things WJ-related at: http://www.wjjeeps.com/. [ Return to Jeep page ] |